FunKey Super Session
Introduction
The LUCID software allows various ways of setting up each identification session. There is flexibility in the Subsets of characters that you can use, how the Entities Remaining are listed (Ranked or Filtered), and there are various methods of showing you the Best characters to use at any step. The size of the four windows for Entities and Features can also be adjusted.
A general introduction on How to Use FunKey is available, and full details of all operations and functions can be accessed by means of the Help button on the toolbar (the question mark in the blue circle, which is the last button on the right).
In our extensive testing of FunKey we have found one particular set-up (described below) to offer great power in quickly getting to the right answer. This method requires the use of microscopic characters, but if you do not have access to a compound microscope, you can still get a long way towards accurate identification by using other Subsets of characters such as All Macrocharacters.
FunKey Super Session set up
- On starting the key, select the Entities Remaining window by clicking the heading or anywhere within the pane, and expand the list of taxa with the Expand selected list button on the toolbar (third button from the left).
- You may wish to switch off the thumbnails for each taxon with the Entity Thumbnails button on the toolbar (eighth button from the left). This lets you see more names of taxa in the Entities Remaining window.
- List the taxa using the Ranked Sort button on the toolbar (sixth button from the left). This will arrange the taxa by their percentage match against the character states that have been selected. Before any character states have been selected, all taxa are a 100% match.
- View the Features Available as a list (using the Lists tab at the bottom of the Entities Chosen window on the lower left of the screen).
- Make Features Available the active window, again by clicking the heading or anywhere within the pane, and expand the list with the Expand selected list button (this may take a while to display all the thumbnails).
- Go to the Features menu and choose the Sort Best option from Best Mode. Note that this feature only works when Features Available are in Lists view.
- Also in the Features menu, chose Auto Best under Automate.
- Click on the Subsets button on the toolbar and choose the Fast All Characters subset by selecting the relevant checkbox. This optimises the diagnostic quality of characters, reducing the number of Features Available from a potential of 115 characters to 35 (of which 33 are visible initially).
- Within the Fast All Characters subset there are two additional dependent characters (Cheilocystidia shape and Pleurocystidia shape) that only appear if Cheilocystidia or Pleurocystidia are chosen as being present.
- Reduce the size of the Features Chosen and Entities Discarded windows, and make the Features Available window larger, so that it is about twice as wide as the Entities Available window (but you can still read the names of the taxa in the latter window).
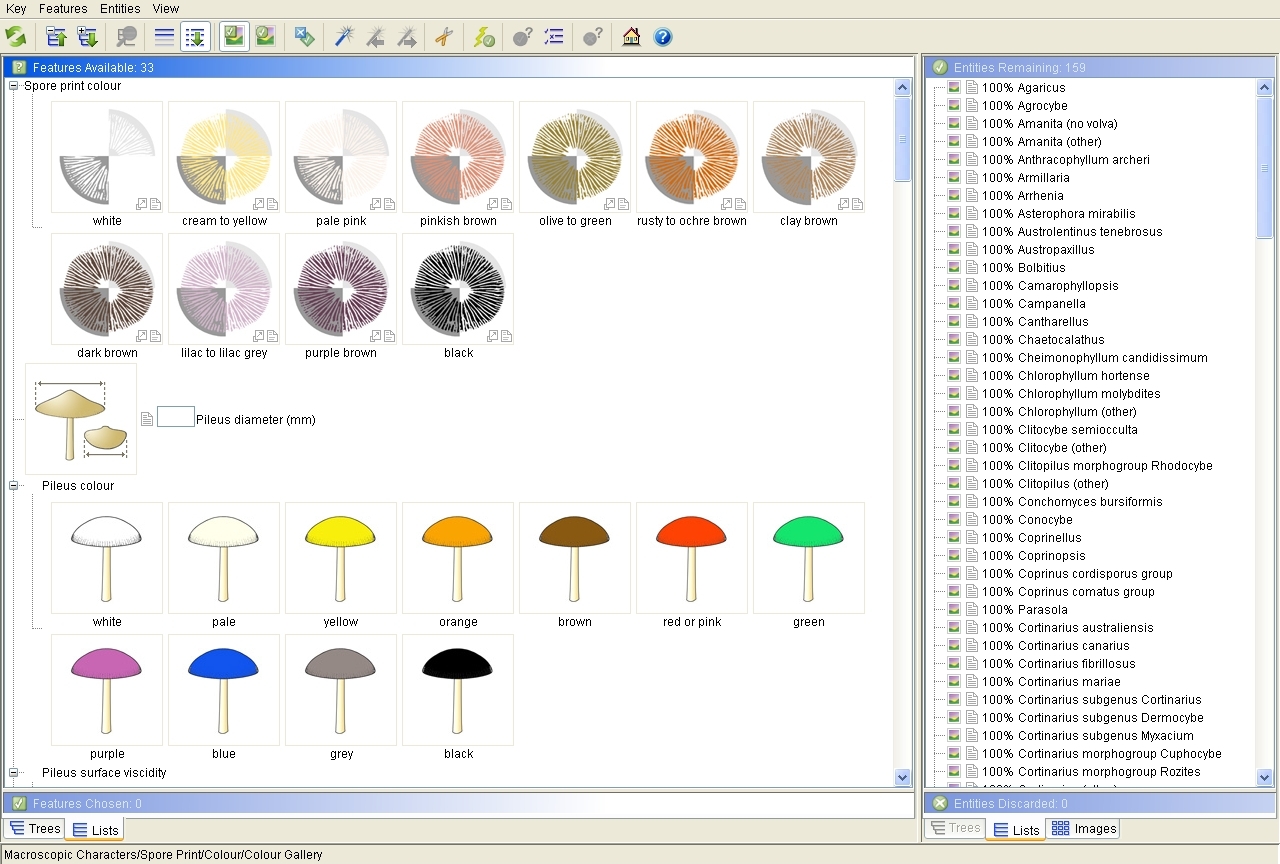
The screen will now look like this:

The Lucid interactive key window after setting up for a FunKey Super Session.
An identification session
- With Auto best and Sort best activated (as above), click the magic wand (Best) icon in the toolbar, which sorts the characters so that the most discriminatory are at the top of the Features Available window. Spore print colour remains at the top of the top of the list (because it is a highly discriminatory character); but now Spore colour (microscope) is the second character in the list.
- Once you select a character state of the best character, the taxa that match 100% are placed at the top of the list of taxa in the Entities Remaining window, and the best character from those remaining automatically advances at the top of the Features Available window. Choose the character state that best matches your specimen, and repeat this process until you have an identification.
- If you want to choose more than one state from a particular character, hold down the Ctrl key and click on each state. After you release the Ctrl key you will need to select Best again.
- If you donít want to use the best character (the one at the top of the Features Available window) you can choose a state from any character. Once you have selected a state, the best character that separates the remaining genera is again displayed at the top of the Features Available window.
- Once there is only one or no taxa that match 100% (using a Ranked Sort) or only one or no taxa remaining in the Entities Remaining window (using a Filtered Sort), the Sort Best function no longer operates, but reverts to Find Best. If there is only one taxon left you can continue to select characters as they are suggested, to make sure that your specimen does match the remaining taxon across a range of characters.
- If you are keying out a quite unfamiliar specimen, choose as many character states as possible. You may get a match of 100% for just one taxon after a few steps, but you should continue to add characters so that at least 10 character states are selected.
- If the percentage for the taxon that matches best drops below 100%, consider if you have correctly interpreted the character. Click on the taxon name and use the Why Discarded button to see which character states of you specimen do not match the characters of the particular taxon. If you are happy with your choices of character states, then the less than perfect match is an excellent indication of the likely identification. The reason for the lack of a perfect match is most likely because you are keying out a specimen that exceeds the known variation in the genus, such as because it is undescribed, or it is possible that there is an error in the coding of the key.
- If several taxa with 100% match remain and you have answered as many questions as you can from the Fast All Characters subset, choose All Features from the Subsets menu, and continue with the identification session.
- If you still cannot get a unique identification, consult taxon fact sheets (accessed from the small page icon to the left of the taxon name) and images for each taxon (accessed from the small image icon to the left of the taxon name). You can also look at images of all taxa that match the particular characters that you have selected by switching to a Filtered Sort (on the toolbar) and clicking on the images tab at the bottom of the Entities Discarded window.
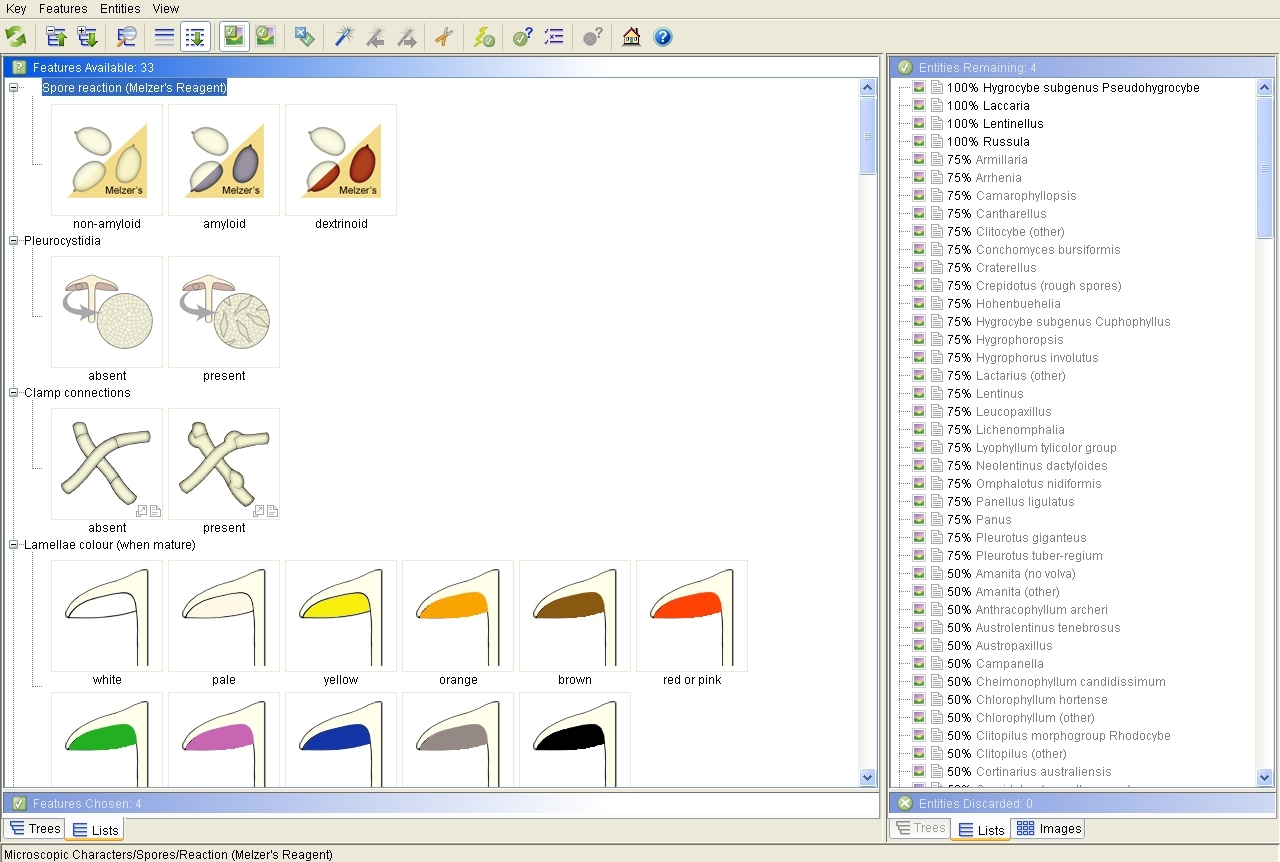
The screen will look like this after you have selected some character states:

The Lucid interactive key window after choosing the following states: white (for spore print colour), decurrent (for lamellae attachment), soil (for substrate) and spinose (for spore ornamentation). There are four taxa with a 100% match against this set of character states. The best character to separate the remaining taxa has appeared at the top of the window - the reaction of spores in Melzer's reagent. If the state 'amyloid' is chosen next, there will be a 100% match only to Lentinellus and Russula. The key indicates that the next best character is now clamp connections. If the state 'present' is chosen, there will be a 100% match only to Lentinellus.
Another identification session
- When you want to identify another specimen using Super Session settings, first ensure that the Keep Subsets on Restart option is selected under the Key menu, and restart the key with the Restart Key button on the toolbar.
- You now need to reconfigure options as follows (as when first setting up a Super Session): for Features Available choose the Lists diplay mode and Expand selected list; in the Features menu choose the Sort Best option from Best Mode; and choose Ranked Sort. [Auto Best remains selected on restart, as does the Fast all characters subset that you have just been using.] Select the Best magic wand, and you are ready to start another identification session.
